Mechanical Anchoring
VIEW RANGE
Chemical Anchoring
VIEW RANGE


Consumables
VIEW RANGE
Construction Chemicals & Accessories
VIEW RANGE
Chemical Anchoring Accessories
VIEW RANGE
Tools Accessories
VIEW RANGE
Bracing
VIEW RANGE
Bolted Connections
VIEW RANGE

Get Exclusive FIRST Access to:
New Product announcements
Ripper giveaways & promotions
Tips & tricks plus more...
Don’t Miss Out!
Become part of the RamFam and never miss out!
Error: Contact form not found.
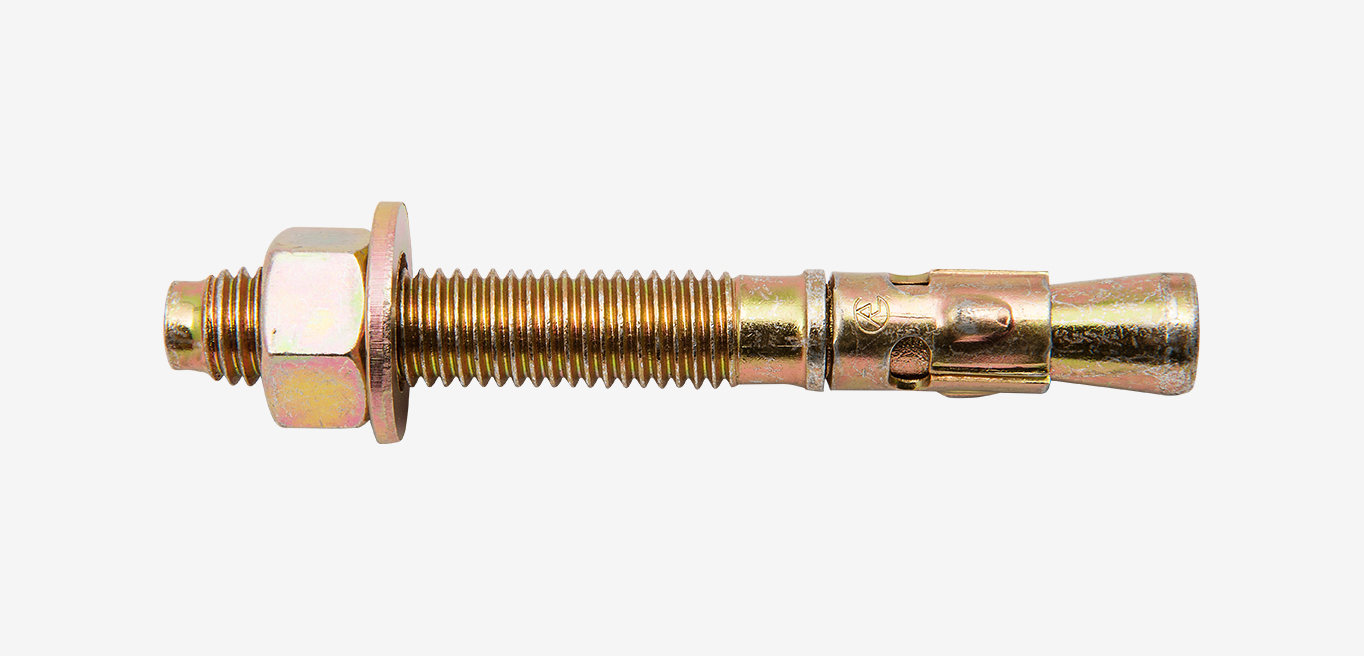
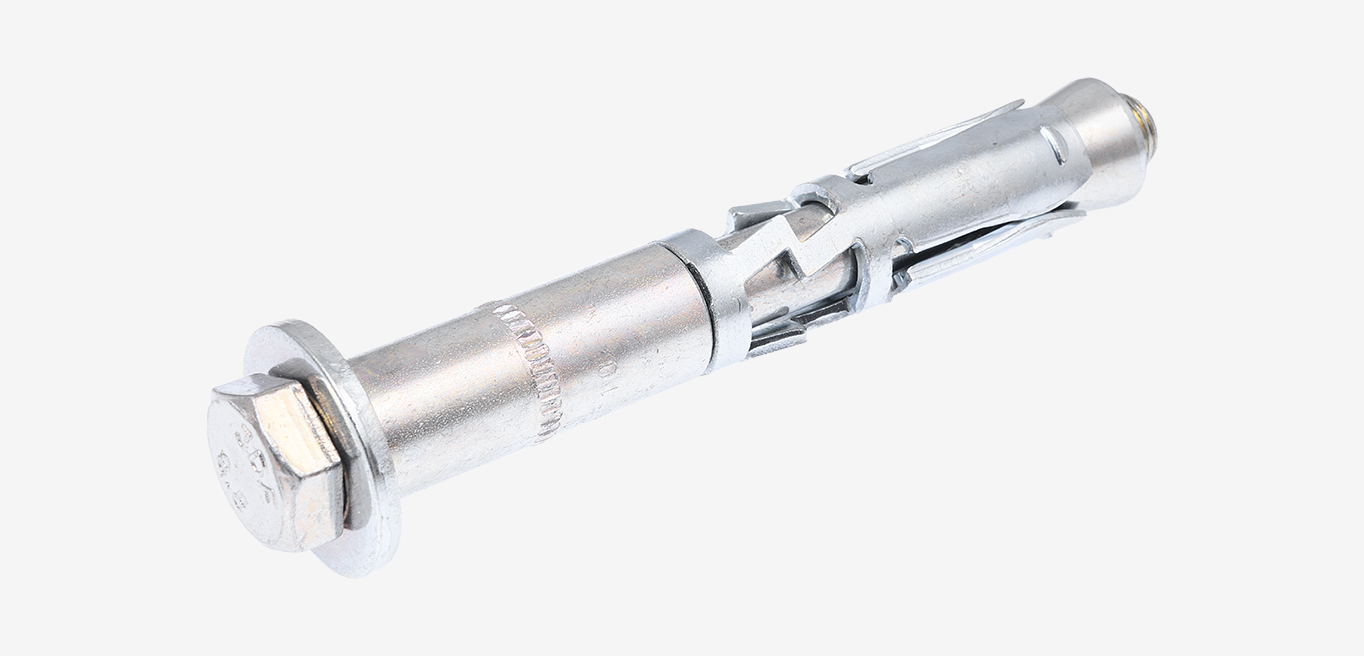
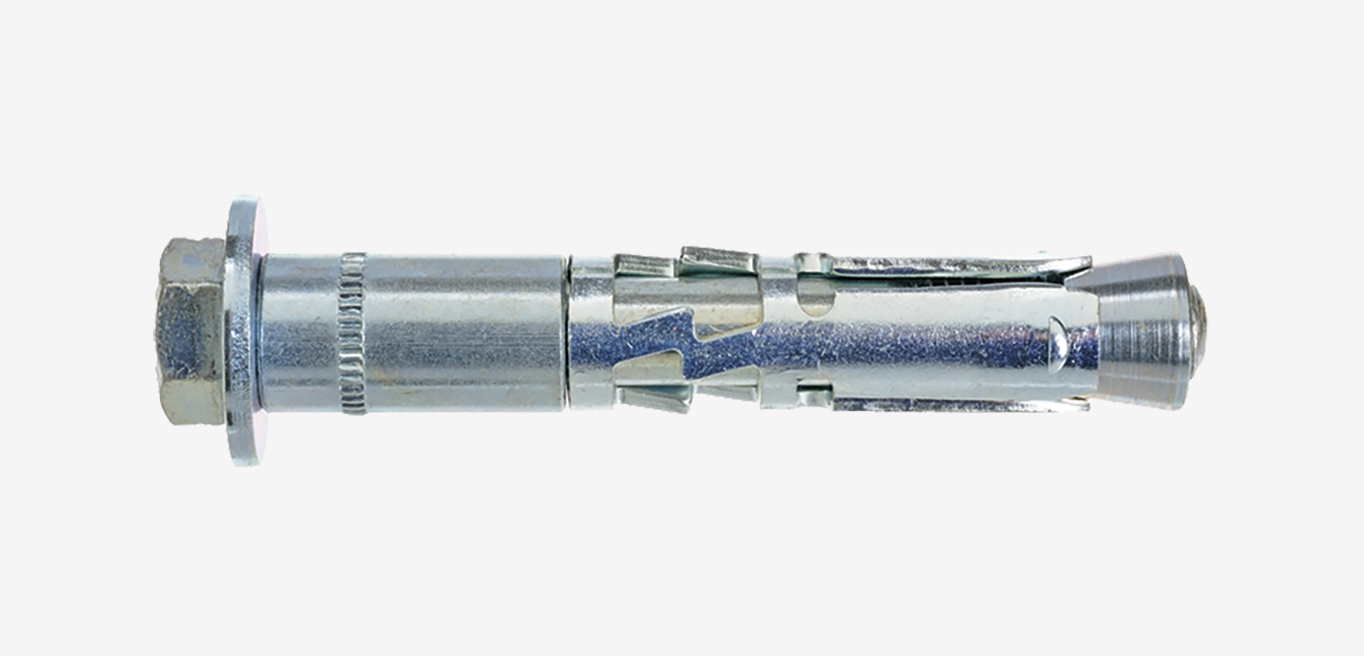
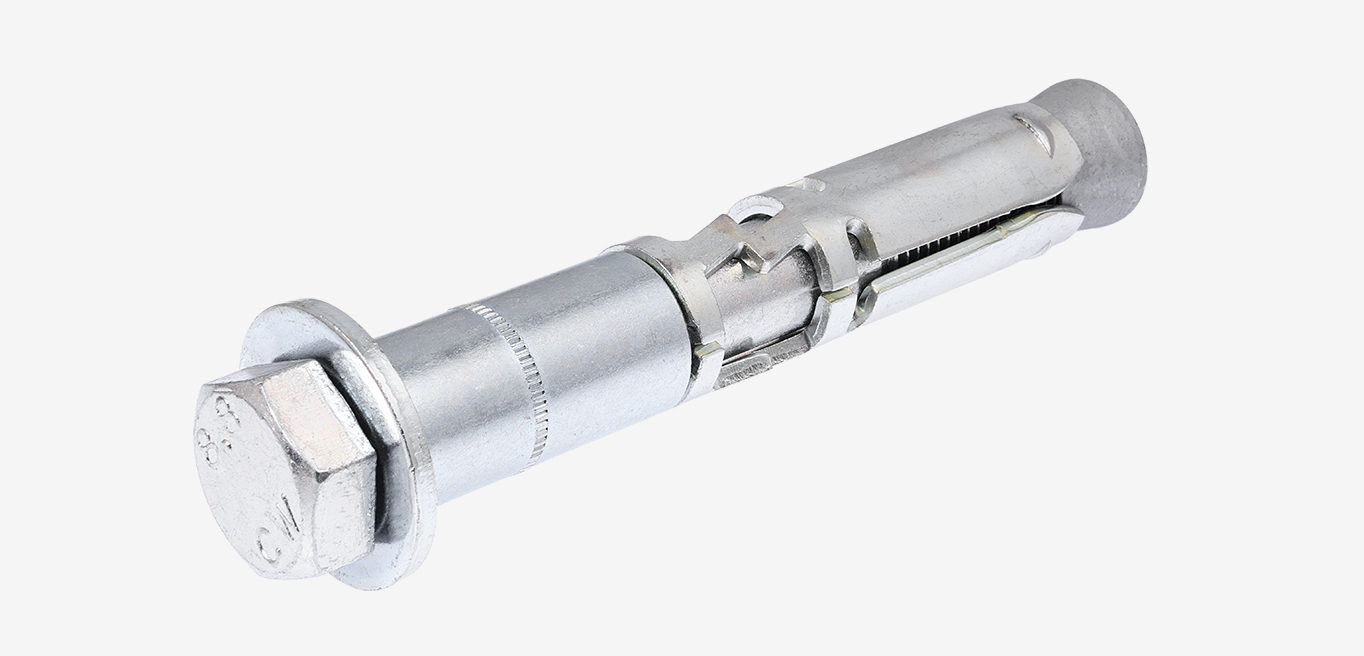
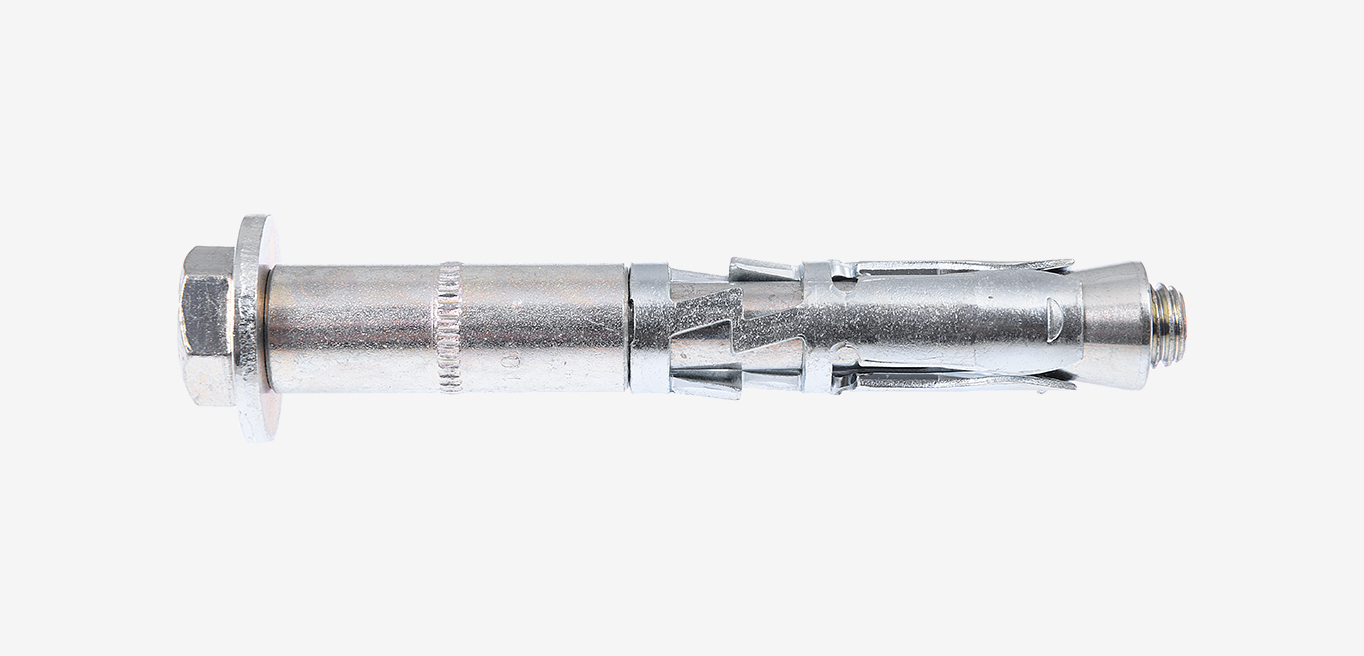
SpaTec™ Xtrem™
The SpaTec Xtrem Safety Anchor is a heavy duty, torque controlled expansion anchor, with an integrated pull-down section, designed for high performance in both static and dynamic load applications, in both cracked and non-cracked concrete and for seismic applications. Ideally suited for through fixing into concrete when security and reliability are paramount.
Thread Size
- M10
- M12
- M16
- M20
Anchor Length (mm)
- 105
- 120
- 145
- 170
Before visiting a Stockist or Service Centre, contact them to ensure product availability.
PART NUMBER:


Contact Details

-+PRODUCT INFORMATION
Click on the column headings to reorder the table.
| ITEM CODE | Thread Size | Anchor Length (mm) | Max. Fixture Thickness (mm) | Drilled Hole (mm) | Min. Hole Depth (mm) | Effective Length (mm) | Fixture Hole (mm) | Order Qty | ADD TO TOOLBOX |
|---|---|---|---|---|---|---|---|---|---|
| SP20170 | M20 | 170 | 25 | 28 | 165 | 150 | 32 | 5 | |
| SP16145 | M16 | 145 | 25 | 24 | 135 | 125 | 26 | 10 | |
| SP12120 | M12 | 120 | 25 | 18 | 115 | 105 | 20 | 25 | |
| SP12105 | M12 | 105 | 10 | 18 | 95 | 90 | 20 | 25 | |
| SP10105 | M10 | 105 | 20 | 15 | 95 | 90 | 17 | 25 |

STEEL ZINC PLATED

STAINLESS STEEL

GALVANISED STEEL
The selected variations added in the toolbox. Please view the items in the toolbox.
-+FEATURES & BENEFITS
- The combination of a high tensile class 8.8 bolt with an extra thick-walled spacer allows a smaller diameter bolt to be used for easier installation while still providing both excellent tensile and shear performance. The spacer also incorporates a visual maximum fixture thickness indicator for ease of use.
- The patented anti-rotation expansion sleeve is designed with sharp angled protrusions that grip the sides of the hole, preventing anchor rotation during installation.
-+APPLICATIONS & TRADES
| Anchoring structural steel column/beams | Steel Fabricator |
|---|---|
| Anchoring HVAC units | Plumbing Contractor, Electrical Contractor |
| Machinery hold down | Maintenance Filter |
| Anchoring crane rails | Construction Contractor |
| Anchoring elevator guide rails | Elevator Installer |
-+SPECIFICATIONS
| Material | Bolt Class 8.8 HighTensile Carbon Steel |
|---|---|
| Corrosion Protection | Zinc Plating |
| Head Styles | Hex Head (SP16145ESS-Hex Nut) |
| Fixing Method | Through Fixture |
| Setting Method | Torque Controlled |
| Anchoring Method | Expansion |
| Substrates | Concrete |